
Quick summary: How to build a simple website on WordPress
- Choose WordPress – It’s free, scalable, and powers over 50% of websites. Ideal for beginners and serious businesses alike.
- Buy a domain and hosting – Get your domain from GoDaddy and use WP Engine for reliable, fast, and secure WordPress hosting.
- Install WordPress – WP Engine does this automatically. If not, use the manual method to set up WordPress via FTP.
- Design and customise – Pick a theme, add content, install plugins, and customise your layout, menus, and SEO settings.
- Go live – Set up Google Search Console and Analytics, submit your sitemap, and request indexing to start gaining traffic fast.
If you’re looking to build a website and don’t know where to begin, you’ve landed on the right page. My name is Alan, and I’ve been designing, developing, and marketing websites since 2008. As a professional web developer and designer, I’ve also created, scaled, and sold numerous websites and blogs across a wide range of online business niches.
In this guide, I’ll walk you through how to create a professional-looking website on a budget. Whether you’re launching a business or personal project, this step-by-step tutorial will show you how to get your website up and running—without the high costs associated with hiring a London web design agency.
If you run into any issues or have questions during the process, don’t hesitate to get in touch—I’m always happy to help.
1
Choose a content management system
The content management system (CMS) is the backbone of your website. It provides the interface through which you create, manage, and publish content, while interacting with a database behind the scenes.
Although it’s possible to build a website without a CMS, I wouldn’t recommend it—especially if you’re just starting out. Here’s why:
- Learning HTML, CSS, and potentially PHP or JavaScript to a professional level can take months, even years.
- Without a CMS, your website won’t be dynamic—editing content will be time-consuming and technically complex.
- You’ll miss out on the powerful functionality, plugins, and integrations available to CMS users.
- Any changes to layout or structure will require a developer, adding unnecessary time and cost to every update.
There are hundreds of website building platforms available, but choosing the right one is a critical first step. You need to understand the platform’s capabilities, flexibility, and future scalability before investing time and resources. Selecting the wrong CMS can become a costly error, particularly if it limits your ability to grow, enhance functionality, or pivot your business later on.
Popular CMS platforms include WordPress, Joomla, and Drupal. While all three have their strengths, WordPress (specifically WordPress.org) is by far the most widely used and beginner-friendly. As a self-hosted platform, WordPress.org powers over 50% of all websites on the internet—thanks to its ease of use, flexibility, and huge ecosystem of themes and plugins.
Take a look at the statistics below:
| Technology | Websites | % |
|---|---|---|
| WordPress | 24,808,989 | 53 |
| Wix | 3,373,287 | 7 |
| Squarespace | 1,886,104 | 4 |
| Joomla! | 1,720,827 | 4 |
| Progress Sitefinity | 1,073,031 | 2 |
| GoDaddy Website Builder | 943,864 | 2 |
| CPanel | 889,970 | 2 |
| Weebly | 878,721 | 2 |
| Drupal | 589,091 | 1 |
| Everything Else | N/A | 23 |
As the data shows, over 53% of all websites on the internet are powered by WordPress. This staggering figure speaks volumes about the platform’s flexibility, reliability, and user-friendliness. Below are just a few reasons why WordPress remains the most popular CMS for building websites:
- Beginner-friendly interface. WordPress is incredibly intuitive and easy to use—even if you’ve never built a website before. If you’re comfortable using basic tools like Microsoft Word or Google Docs, you’ll find publishing content in WordPress a breeze.
- Fully open-source and unrestricted. As an open-source CMS, WordPress is completely free and offers limitless development potential. If your business grows or requires custom functionality, you’re never held back by platform limitations.
- Highly powerful and scalable. WordPress can support websites of all sizes—from simple brochure sites to large ecommerce stores. It’s continuously updated, well-supported by a global community, and trusted by millions of site owners and developers.
- Thousands of free plugins and themes. The WordPress repository includes over 100,000 themes and 50,000+ plugins—many of them free. This gives you the freedom to customise your site’s design and functionality without incurring extra development costs.
- Fully responsive and mobile-ready. Most WordPress themes are designed with mobile in mind, ensuring your site looks great on every device. Even the admin dashboard is mobile-friendly, so you can manage your site on the go.
- Access to a large pool of developers. While you won’t need a developer to follow this guide, it’s reassuring to know that if you do need support, WordPress professionals are readily available and easy to find.
- It’s completely free. WordPress doesn’t cost a penny to use. The only expenses you’ll incur are for your hosting and domain name—which means you can build and run a website with very little upfront investment.
WordPress is hands down the most versatile platform I’ve worked with. Whether you’re building a small business site, ecommerce shop, corporate portal, or personal blog, WordPress provides the perfect foundation.
2
Register a domain name and get website hosting
There are two essential components you’ll need when building a website using a content management system, as opposed to a basic website builder:
- Domain Name – This is your website’s address on the internet. It’s what users type into their browser to access your site, and it links your content to the web via your hosting server.
- Web Hosting – This is the server where all your website files, images, content, and data are stored and served to visitors.
Building your website with a CMS on your own hosting plan has several advantages. Most importantly, you maintain full ownership and control over your website. You’ll have unrestricted access to every file, image, and line of code, giving you total flexibility to customise, optimise, and scale your website as your business grows. This is one of the many reasons I recommend using WordPress, or another trusted open-source CMS.
Owning your own domain name is inexpensive and offers lasting value by protecting your brand identity. Most hosting companies include a free domain for the first year when you sign up, and ongoing renewals typically cost around £10 per year.
Where can I register a domain name?
Here’s where it starts to get exciting – it’s time to choose your domain name. If you already have one, feel free to skip ahead to Step 3. Otherwise, head over to GoDaddy and continue reading.
Your domain name can be anything relevant to your business, as long as it’s available. It could be your company name, your personal name, a description of your service or product, or a unique brandable word you’ve created. Type it into the GoDaddy search bar and choose a domain extension that makes sense for your business.
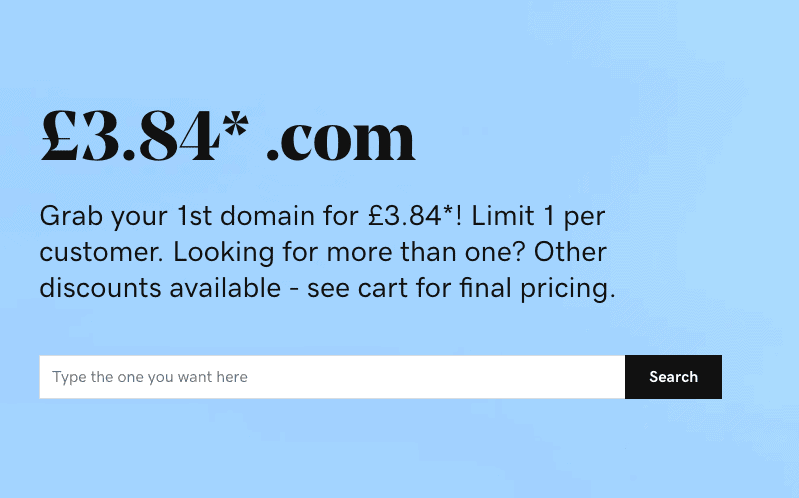
Once you search, GoDaddy will show whether your chosen domain is available and suggest 15–20 variations using different extensions or spelling adjustments.
I always recommend choosing a .com domain if available, as it’s the most widely recognised and trusted extension. However, given how many .coms have already been registered over the years, you may find it’s not always possible. In that case, other top-level domains (TLDs) like .net, .org, .biz or local options such as .co.uk or .us are all perfectly acceptable – as long as they suit your business goals.
If you opt for one of the newer, creative TLDs (like .design or .tech), that’s fine too. Just keep in mind that traditional extensions like .com and .co.uk tend to be the most memorable and trusted by users – and are often preferred in professional settings. For more on this, visit our guide on choosing a domain name.
Choosing the right domain name when you build a website
Before registering your domain, take a moment to read these quick tips on how to choose a name that works. Remember – this is the name you’re likely to be stuck with for years to come, so make sure it follows best practices.
For a more detailed walkthrough, see our full guide: How To Choose A Domain Name
Brand vs Generic
Your domain name should be something that represents your business and is easy for customers to remember. Names like flubalubalubber.com are best avoided unless you’re building a novelty brand. On the flip side, something too generic like garyandjimsbicycleshop.com isn’t ideal either. The sweet spot is a name that’s both brandable and descriptive enough to convey what your business does.
Incorporate Keywords
From an SEO standpoint, it can be useful to include relevant keywords in your domain – but only if it feels natural. For instance, “Webpop Design” includes both a branded element and a relevant keyword. A domain like BestWebDesignersInLondon.com, however, feels clunky, overly optimised, and may even run into copyright issues. There’s no strict rule, but if your domain looks like it’s been stuffed with keywords, it probably has – and that’s best avoided.
Choose The Right Extension
While .com remains the gold standard, many other extensions are acceptable alternatives. .org and .net are solid choices, and geographic domains like .co.uk or .com.au are great for targeting local markets. Try to avoid novelty extensions unless you’re confident they suit your brand. Even then, a more traditional TLD is usually the safer, more professional option.
Make It Easy To Type and Remember
Even though most users will find you via Google, having a domain that’s easy to remember and spell is vital. Avoid complicated, unusual words or tricky spellings. Your aim is for someone to be able to type your domain into a browser with zero effort. This helps drive direct traffic and makes your brand much more accessible.
Keep It Short and Sweet
Shorter domain names are easier to remember, more visually appealing, and better suited for marketing materials. Try to stick to under 15 characters. This rule of thumb will also help ensure your domain is more brandable and less prone to user error.
Avoid Hyphens and Numbers
Steer clear of hyphens and numbers in your domain – they make things unnecessarily complicated. They’re difficult to say aloud, easy to misremember, and generally look unprofessional. In short, they reduce your domain’s effectiveness and can hurt your credibility. Keep it clean, memorable, and straightforward.
Where can I host my website?
I personally use WP Engine to host both my own websites and those of my clients. While WP Engine may come at a slightly higher cost than some alternatives, their service truly is second to none. There are countless reasons to choose WP Engine over other hosting providers—but we’ll save the full list for another article.
WP Engine is an established hosting company with a long-standing reputation for delivering reliable and high-performance WordPress hosting. With data centres located in the UK, US, and Canada, their infrastructure is fully optimised for WordPress websites—offering excellent speed and uptime globally. Regardless of where your audience is located, your website will load efficiently, and you’ll likely find WP Engine more cost-effective than local alternatives due to their scale.
A key consideration when choosing a hosting provider is support. WP Engine sets the gold standard in this regard. Their technical support team is without doubt the best in the business. They offer 24/7 live chat access to server technicians who are able to troubleshoot and resolve technical issues immediately. This level of support is rare and one of the main reasons I confidently recommend WP Engine to every client.
Another standout feature WP Engine provides is free SSL certificates for all hosted websites. Many hosts charge extra for SSL, so this inclusion adds great value and enhances security. It’s just one more reason to take a look at WP Engine.
Step 1. Visit www.WPEngine.com
Start by heading to WP Engine’s homepage. You’ll find a quick overview of their hosting services. When ready, click the prominent orange “Get Started” button to proceed.
Step 2. Select a website hosting plan
For most beginners looking to build a website in WordPress, shared hosting is the best place to start. Unless you’re expecting a large volume of traffic right away, a shared hosting plan is more than sufficient. WP Engine also offers scalable VPS and dedicated server plans, which you can upgrade to later as your website grows.
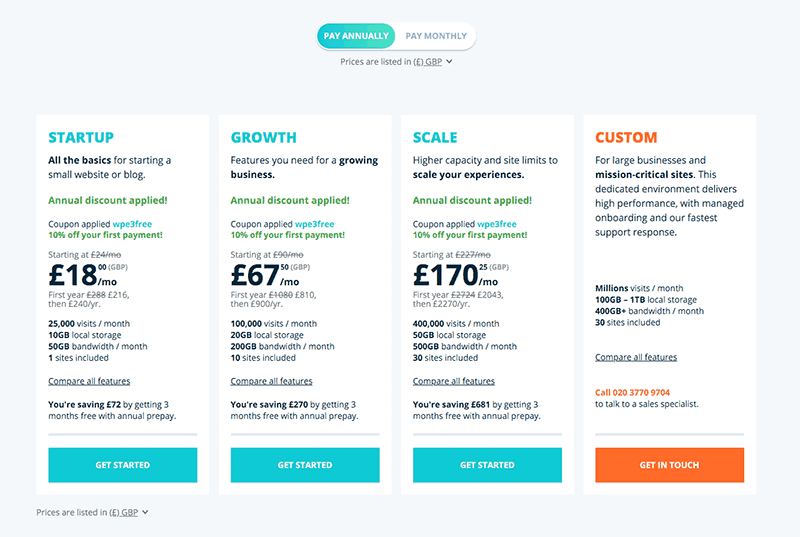
Shared hosting is both affordable and fully equipped with the tools you’ll need to get online quickly. WP Engine offers four main hosting plans:
- Startup
- Growth
- Scale
- Custom
The Startup Plan is ideal for most small businesses. It supports one website, provides 10 GB of storage, 50 GB of bandwidth per month, and allows for up to 25,000 monthly visits. It also includes a free SSL certificate—making it a robust option for most users.
Should your needs change as your website grows, WP Engine makes it easy to upgrade your plan from within your dashboard.
Once you’ve selected the plan that suits your needs, click the “Select” button to move forward.
Step 3. Provide your account details
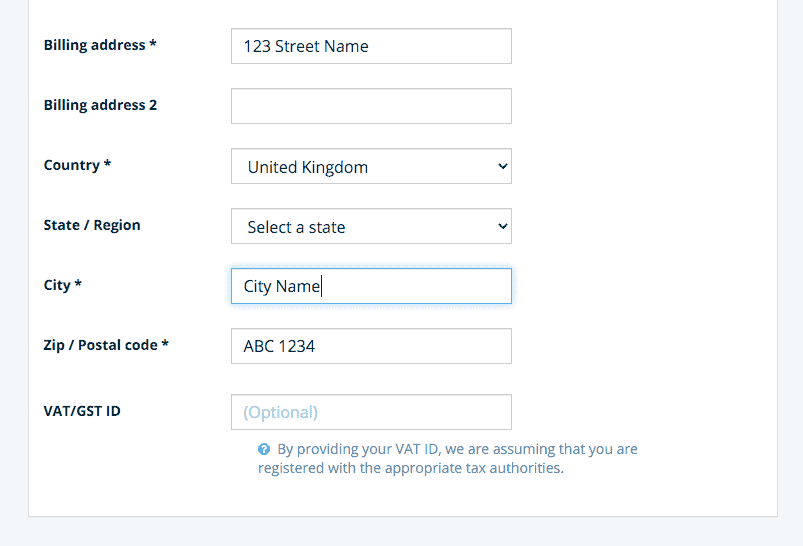
Next, you’ll need to complete the account setup form. The two fields to focus on are “Datacenter” and “Account Name.” Select the data centre closest to your business’s primary audience for best performance. For the account name, simply use your business name—without spaces.

You’ll also be asked for your billing details. This information will be used for payment processing and to administer your account. WP Engine accepts major payment methods including debit/credit cards, PayPal, cheque, and bank transfer.
Step 4. Check your plan information and complete the registration process
Before finalising your order, review your plan details and billing summary in the right-hand column. You’ll notice there’s a small discount already applied—this is exclusive for first-time users and is increased if you choose an annual plan.
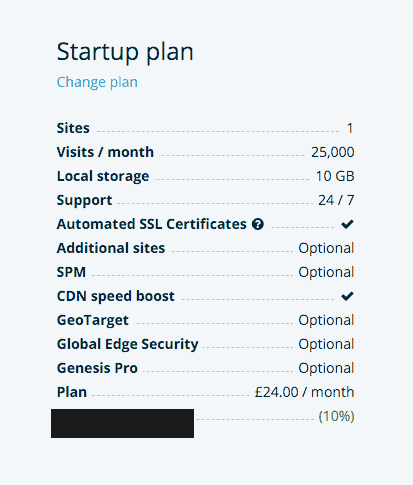
You’ll also see an option to add extra features to your plan. While most users won’t need these, the “Global Edge Security” add-on is worth considering. It includes:
- Advanced site protection via DDoS mitigation
- A Web Application Firewall (WAF)
- SSL/TLS at the network edge
- Cloudflare CDN integration
This level of protection is great for security-conscious users, although it won’t be necessary for most smaller sites.
Step 5. Confirm your account
After submitting your order and payment, WP Engine will send you a confirmation email with a link to set your password.
Click “Create your password” to finish creating your account. Make sure to store your password safely—it’s needed to log into your WP Engine account and contact support.
Once complete, you’re ready to move on to Step 3: Setting Up Your Website.
3
Setup and build a website with WordPress
Hosting is purchased and your domain name has been registered, the next step is usually to install the WordPress CMS to your hosting account. However, we’re working with WP Engine here and things are different!
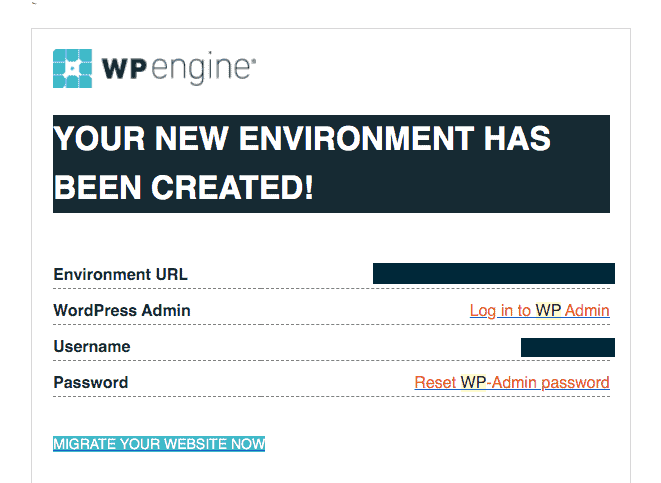
Remember when WP Engine asked you for your account name when you registered? Well, they just set you up with a basic WordPress install on a temporary domain name so you don’t have to lift a finger! You should receive an email like the one below about 10 minutes after you register.
Manual installation of WordPress
Most hosting companies don’t provide automatic one-click installations of WordPress. If you’re unlucky enough to have signed up with a host who doesn’t support this, you’re going to need to install WordPress manually.
Don’t worry. The simple guide below will walk you through the steps. Just follow my instructions and you’ll have WordPress installed on your host in a jiffy.
- Download WordPress from the official repository: https://wordpress.org/download/
- Unzip/decompress the WordPress folder to your desktop.
- Inside the WordPress folder there is a file named wp-config-sample.php. Rename it to: wp-config.php – you can do this by right clicking and selecting “Rename”
Open wp-config.php with notepad or any other text editor and edit the following lines:
define('DB_NAME', 'database_name_here');
define(‘DB_USER’, ‘username_here’);
define(‘DB_PASSWORD’, ‘password_here’);
You can ask your host for your database name if you don’t have it already and your hosting username and password will be the same as when you registered for your hosting account.Once the above is done, then save the file.
- You are going to need an FTP program to connect to your hosting account. Download FileZilla for your operating system from https://filezilla-project.org/download.php
- Open FileZilla and connect to your hosting account. The FTP host address is usually ftp.yourdomain.com, and the username and password are the same that you used to register to your host.
- Once you are connected to your host you’ll most likely land in a folder called public_html. This will be displayed in the right hand window (your host) of Filezilla. If there is file there named “index.html” – delete it.
- In the left hand window (your local machine) browse to the WordPress folder you just unzipped, select all files and drag and drop them to the right hand folder (your host). Depending on your internet and host speed these files may take up to 15 minutes to upload,
- Once all the files are uploaded visit this URL in your browser and complete the installation process: www.yourdomain.com/wp-admin/install.php
Point your domain name to your hosting account
The final step in this process, is to point your domain name to your new hosting account. Thankfully WP Engine makes this really easy too.
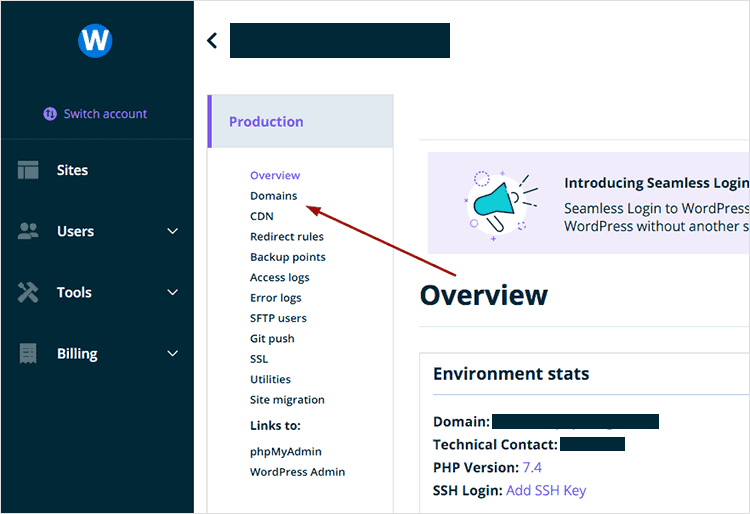
To get started simply login to the user portal and click on “Sites”. Then click on your install name in the right hand column and click on “Domains” on the left hand side of the screen.
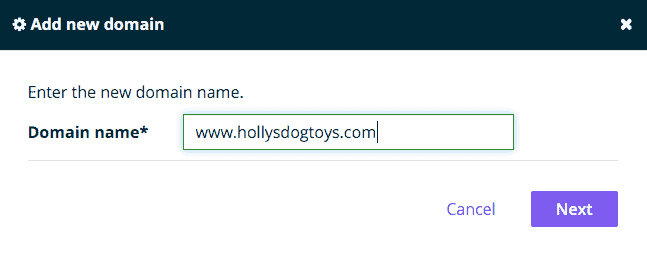
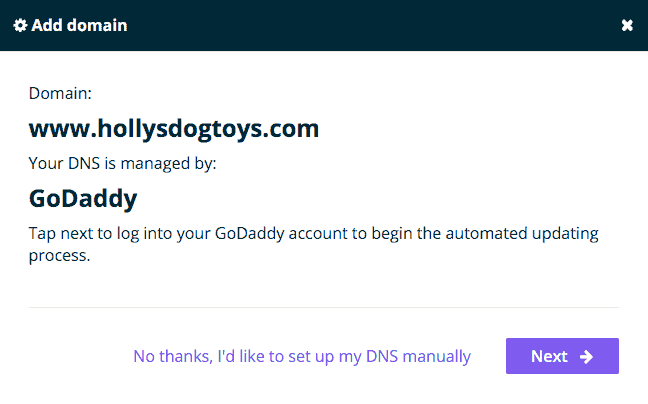
Now click “Add Domain”. Type in your domain name with www. and click Next, now a popup will show and ask you to login to Godaddy. This will change all of the tricky DNS settings needed to point a domain name to your server.
Follow the on-screen prompts and your domain name will be automatically configured to point at your new website.
That’s it. Now you’re ready to build a website with WordPress. Things are about to get exciting!!!
4
Design your website
Here comes the fun part! It’s time to make your website look amazing. The best thing is, designing a website is surprisingly straightforward — once you know how.
When we installed WordPress on your hosting account, a default theme was automatically installed and activated. A theme is essentially a template with a predefined design that tells WordPress how your website should appear. Your website should currently look something like this:

While the default theme is clean, simple, and presentable, it’s also widely used. If you’d like your site to stand out and reflect your unique brand identity, it might be worth exploring other theme options.
Free WordPress themes
Fortunately, WordPress has a built-in repository with thousands of free themes created by skilled developers — all of which you can use on your site.
Here’s how to find a theme for your website:
Login to WordPress at http://www.yoursite.com/wp-login.php
Enter the username and password that WP Engine emailed to you earlier. You’ll then be redirected to your WordPress dashboard.
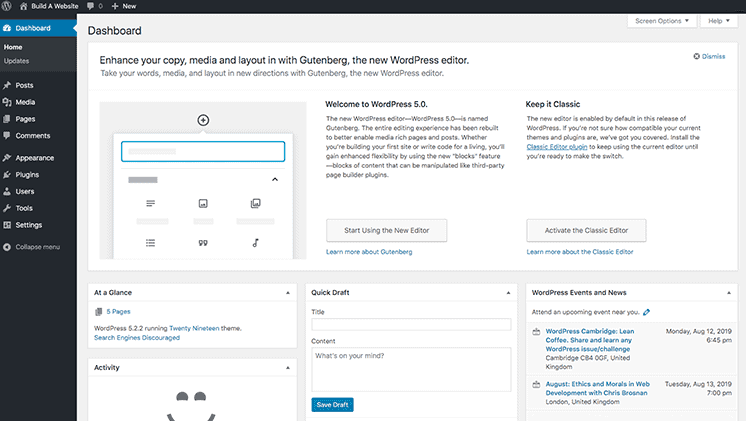
As you’ll notice, there are quite a few sections, menus, and buttons. It might feel a bit overwhelming at first, but don’t worry — you’ll soon be navigating it like a pro.
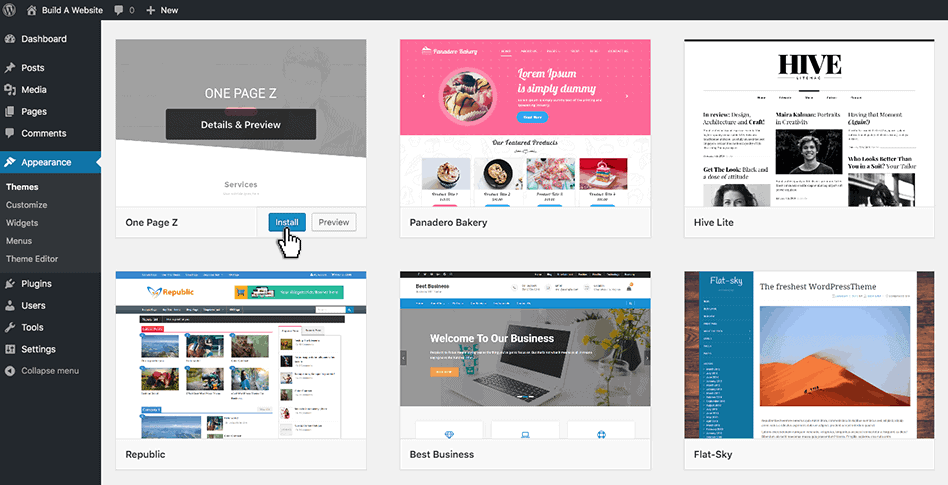
In the left sidebar menu, click “Appearance”, then select “Themes”. This takes you to the WordPress theme repository. Click the “Add New” button at the top of the page.
From there, you’ll be able to search and filter all the free themes available. You can sort by category, popularity, most downloaded, or even search by keyword. This makes it much easier to find a theme that matches your vision.

I’d recommend taking your time here to explore the options. While you might come across a few basic or outdated designs, there are definitely some hidden gems that look brilliant and function just as well — and best of all, they’re completely free.
Premium WordPress themes
If you can’t find a free theme that meets your expectations, or you’d simply prefer something more professional and polished, purchasing a premium theme might be the best route for your website.
Premium themes tend to be far more reliable than free alternatives. They’re updated regularly, often built by experienced web designers, and typically include dedicated support should you encounter any issues or need assistance with theme-related features.
Many premium themes also come bundled with intuitive page builders, drag-and-drop functionality, and highly customisable templates — giving you the freedom to craft your layout exactly how you want it.
For excellent support, consistent updates, quality coding and a wide range of flexible features, both ElegantThemes and ThemeForest are top-tier platforms for WordPress site owners.
ElegantThemes is the team behind the popular Divi theme, one of the most customisable and best-selling WordPress themes of all time.
ThemeForest is a comprehensive premium theme marketplace offering WordPress themes for virtually every type of business niche. Whatever your industry or goal, you’ll find a theme to match.
How to install your WordPress theme
Now that you’ve selected your theme, it’s time to install it on your website. This step is nice and simple — just click on the “Install” button, upload your theme folder, and then click “Activate”.
Free themes usually configure themselves automatically upon activation. Premium themes, however, may involve a few more setup steps. But don’t worry — most come with clear installation guides, and many even include a demo import feature so you can replicate beautiful, ready-made layouts with ease.
IMPORTANT: You can change your WordPress theme as often as you like without losing any of your content, pages or blog posts. So, if you ever feel your site could use a design refresh down the line, you can switch themes in just a few clicks — another reason why WordPress is such a powerful and flexible platform.
5
Adding content to your website
Now you have your theme installed, it’s time to start adding content to your website. This is where the term “content management system” really comes into its own — and you’ll quickly see why WordPress is such a powerful tool for managing your site.
Below, I’ll walk you through the essential tools and features that will help get your WordPress website up and running.
How to publish pages
If you want to create an “About Me” page or one that outlines your services, follow the steps below:
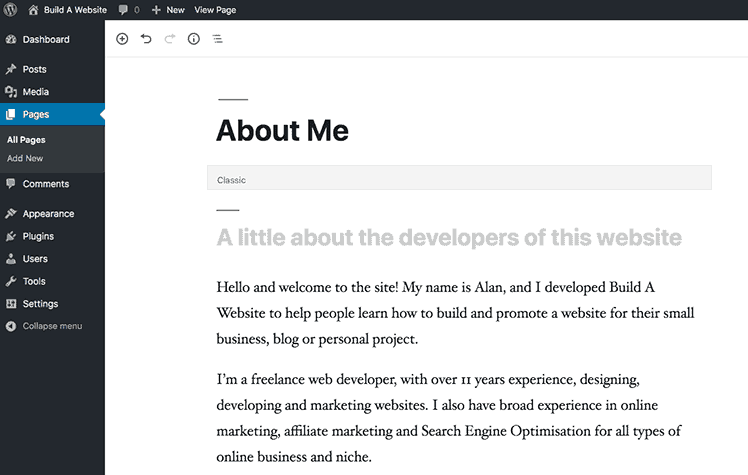
- In the WordPress dashboard, go to “Pages“ -> “Add New“
- You’ll see a WYSIWYG editor (what-you-see-is-what-you-get), similar to Microsoft Word or Google Docs. Add your text and images directly into the layout. When you upload images, you can align them left, right, or centre and apply margins and captions easily using the media uploader.
- Once you’re happy with your content, click “Publish” and preview the page on your site.
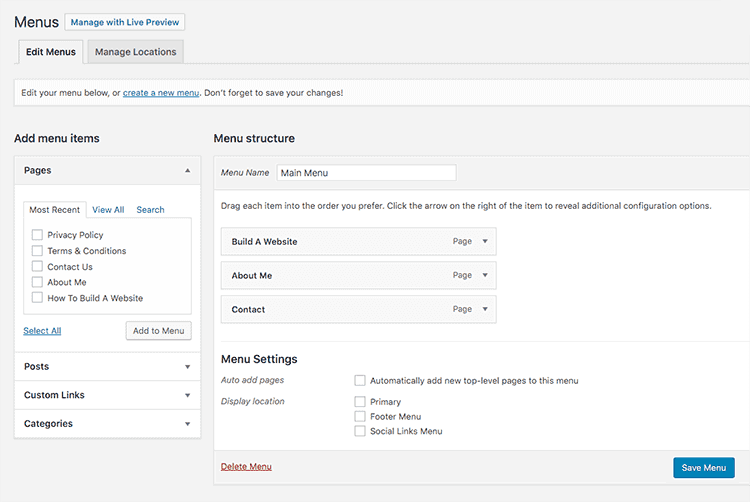
How to add a menu
Creating a navigation menu in WordPress is simple. Most themes come with predefined menu locations — usually labelled as “Primary Menu” or “Footer Menu”.
- In the WordPress dashboard, go to “Appearance“ -> “Menus“
- If no menu is selected, click “Create A Menu” and choose the desired display location (e.g., “Primary Menu”).
- On the left, you’ll see a list of pages you’ve created. Tick the checkboxes next to the ones you want to include and click “Add To Menu”.
- Once you’re done arranging your links, be sure to click “Save”.
How to publish blog posts
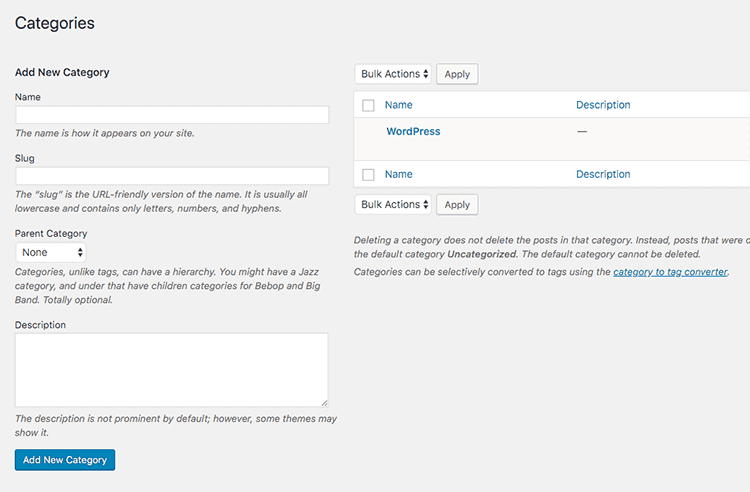
Depending on the focus of your website, you may want a blog section for publishing updates, articles, or news about your business. Blog posts can be organised using categories and tags to help visitors navigate your content.
- To create categories, go to “Posts“ -> “Categories“
- To create tags, go to “Posts“ -> “Tags“
Now that your categories and tags are ready, you can publish your first blog post.
The process is similar to publishing a page:
- In the WordPress dashboard, go to “Posts“ -> “Add New“
- Use the editor to add your blog content and any images. You can align images and add captions using the media uploader.
- Most themes allow you to set a “Featured Image” which will display on blog archive pages. Choose a high-quality image that fits your post.
- Select the appropriate categories and tags from the options you created earlier. Stick to relevant ones for better organisation and SEO.
- Once you’re happy, click “Publish” and view your post live on your site.
Customising your website
Here are some additional features you can customise from the WordPress dashboard to further refine your site’s appearance and layout.
Edit the sidebar
Most WordPress themes include a sidebar on the left or right. You may want to remove it entirely or adjust its content.
- In the WordPress dashboard, go to “Appearance“ -> “Widgets“
- Select the sidebar section you’d like to edit.
- To remove an item, expand it and click “Delete”. You can also drag and drop new widgets from the left into your sidebar.
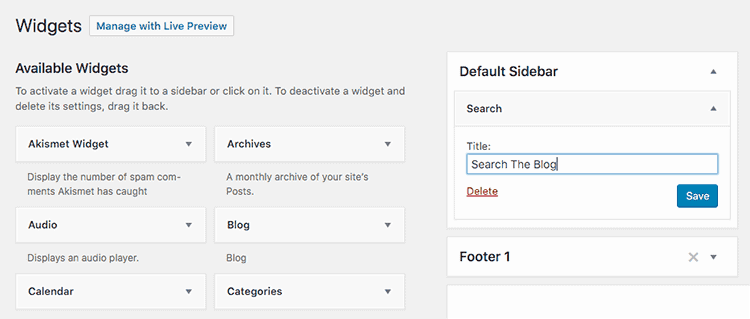
You can add a wide variety of widgets — from categories and search bars to custom HTML blocks, images, and more.
Edit the footer
Footer areas are usually managed in the same way as sidebars.
- In the WordPress dashboard, go to “Appearance“ -> “Widgets“
- Footer sections are often divided into multiple areas (e.g., Footer 1, Footer 2). Select each to customise its contents as needed.
Set up a static front page
By default, WordPress displays your homepage as a blog archive. That’s because WordPress originally started out as a blogging platform. However, you can change this to a static homepage to give your site a more traditional layout.
A static homepage is a fixed page that doesn’t change, unlike a dynamic blog feed that updates whenever you publish new posts.
Setting a static front page is easy:
- In the WordPress dashboard, go to “Settings“ -> “Reading“
- Select an existing page (e.g., “Home”) under “Front Page”. If you’d like to feature a blog elsewhere, choose a page (e.g., “Blog”) under “Posts Page”.
- Click “Save Changes” to apply your settings.
Disable comments on posts or pages
Some websites, usually websites for businesses or companies, don’t want to allow their users to comment on their pages or posts. Thankfully this can be switched off easily.
To turn off comments on WordPress pages:
- Whilst editing or publishing a new page, click “Screen Options” in the top right hand corner.
- Check the “Discussion” box. Scroll down the page to find the “Discussion” meta box
- Untick “Allow Comments” then publish the page.
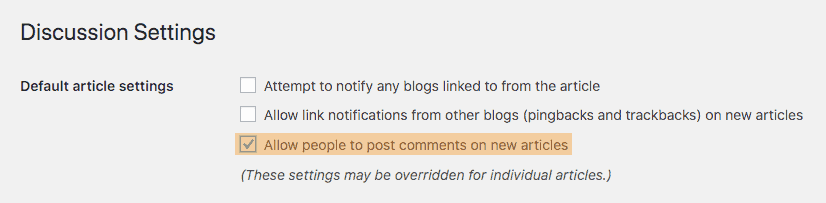
If you want to disable comments sitewide:
- In the WordPress dashboard go to “Settings -> Discussion” and untick “Allow people to post comments on new articles”
Setting the site title and tagline
It’s important that you set the site title and tagline for your WordPress website.
The Site Title is the name of your website. The Site Title for this site is “How To Build A Website”. It’s important to set this correctly as it will show up in various areas on your website and depending on how your website is setup it can play a part in how search engines determine your rankings.
The tagline is not always as important, but some themes display this on the frontend under your logo, and more often than not your Site Title + Tagline is shown in your meta title on your home page (although I’m going to show you how to customise that in the next step of the tutorial). Just hover over the top of the browser tab to see the meta title for this page.
To change the Site title and tagline:
- In the WordPress dashboard go to “Settings” -> “General” and fill out the “Site Title” and “Tagline”.
- Click “Save Changes”
Installing plugins for more functionality
Remember earlier I mentioned about the WordPress plugin repository? Well, there are over 25000 free plugins listed that can add extra functionality or features to your website.
This is one of the main reasons I recommend WordPress. With many other CMS you would need to hire a developer every time you need some kind of extra functionality on your website. Not with WordPress. The community have developed all sorts of plugins that will allow you to add any functionality imaginable to your website. Whether it be a contact form, a photo gallery, ecommerce or SEO – you’re covered.
How do I install a Plugin?
- In the WordPress dashboard go to “Plugins” -> “Add New”
- Search the repository by keyword for the functionality you are looking for.
- Once you find a plugin that does the job, just click “Install”
6
Making your website SEO friendly
If you have followed all the instructions above, configured your theme and added your content, your website should be getting very close to launch! Exciting!
But wait, there’s a number of things I’d recommend doing first, just to make sure your website is in the best shape possible before getting index by Google and the other search engines.
Make permalinks SEO friendly
Permalinks are the URL of your posts or pages. By default, WordPress permalinks use parameters and page ID’s.
For example: yourwebsite.com/?p=123
These are ugly and not SEO friendly whatsoever. You can change your permalinks so they are SEO friendly and this will help your pages, posts and website as a whole get found much easier in Google.
To change your permalinks:
- In the WordPress dashboard go to “Settings” -> “Permalinks”
- Under “Common Settings” select “Post Name”
- Click “Save Changes”
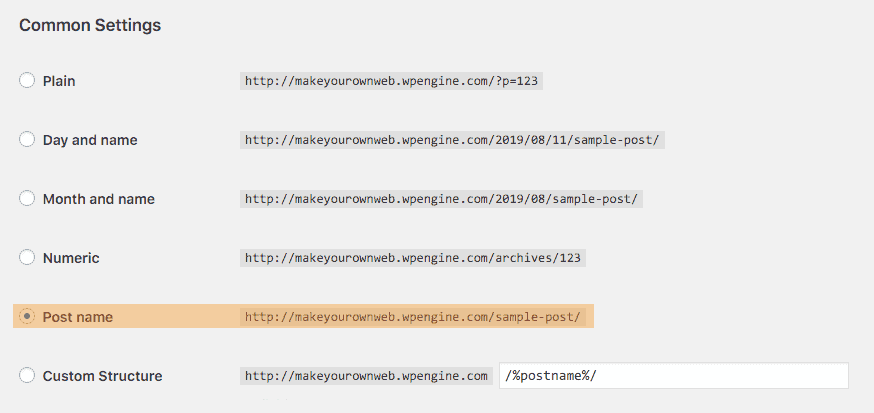
Once you have completed the above, your post and page URLS will look like this: yourwebsite.com/seo-friendly-url
Install the Yoast SEO plugin
The last thing I do when I build a website or when managing any of clients SEO packages is install Yoast SEO. This is a lifesaver plugin that helps you optimise your website from top to bottom and make it as SEO friendly as possible.
It’s all well and good for you to build a website, but if nobody can find it, what’s the point?? Yoast lets you add and edit meta descriptions and meta titles for every page and post on your website, it analyses your page content and tells you how to improve it using keyword density, subheadings, alt tags and even scores your content based on the Flesch reading test.
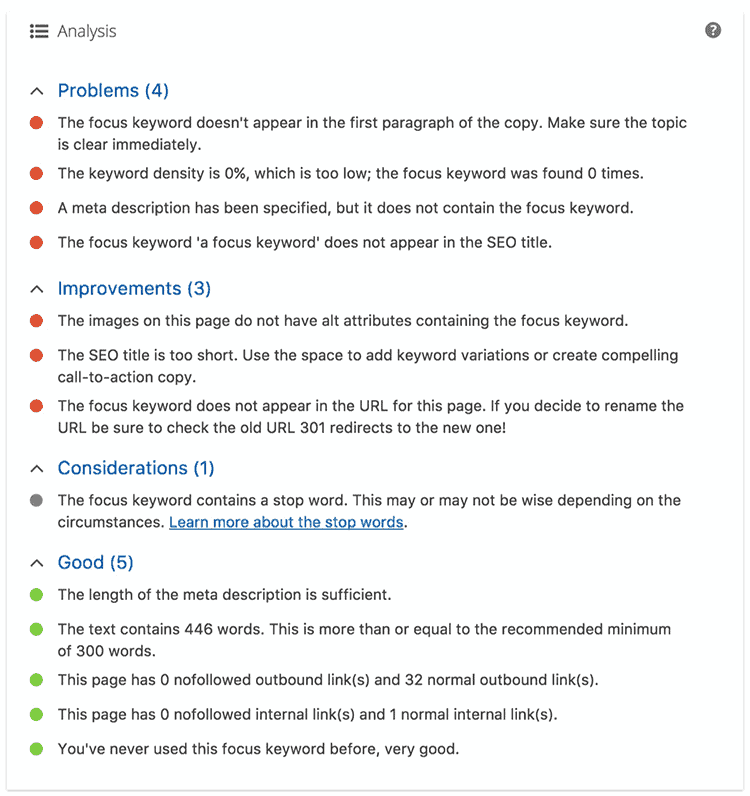
Yoast SEO also generates a handy sitemap of all your pages which we can submit to the search engines to notify them about new content on your site. There are many more features this plugin has to offer (too many to cover here in this one article).
To Install Yoast SEO
- In the WordPress dashboard go to “Plugins” -> “Add New”
- Search “Yoast SEO”
- Now “Install” and “Activate” the plugin.
- Yoast will now take you through a step-by-step process and configure the most important areas of your website for SEO automatically.
- Once that’s done, head over to your posts and pages, click “Edit” and scroll down to the Yoast SEO metabox to start making optimisations on a page by page basis.
Yoast also has a Premium Version which I would highly recommend taking a look at if you’re serious about sky rocketing your traffic in Google.
Making your website accessible to search engines
By default after installation WordPress blocks search engines from accessing your website. This is because they understand you will need to develop and prepare your website before it gets indexed and you release it the world.
To make your website accessible to search engines:
- In the WordPress dashboard go to “Settings” -> “Reading”
- Uncheck “Discourage search engines from indexing this site”
- Click “Save Changes”
IMPORTANT: Only do this is you’re 100% sure your website is ready to launch. We don’t want Google or any other search engine indexing bad URLs or broken pages. You’ve taken this time so far to build a website, let’s make sure it is perfect first.
7
Go live and notify the search engines
You have learned how to build a website for free, how to build your own website with WordPress, change the design, add content, make it SEO friendly and now you’re ready to launch!!!
Below are the exact steps I follow when I launch a new website. This ensures my site gets indexed quickly and is in the best possible position going forward when I publish new content.
Register For Google Search Console
Google Search Console, (or Webmaster Tools as it used to be known) is a free service from Google that helps you analyse and maintain your website’s performance in the Google search results.
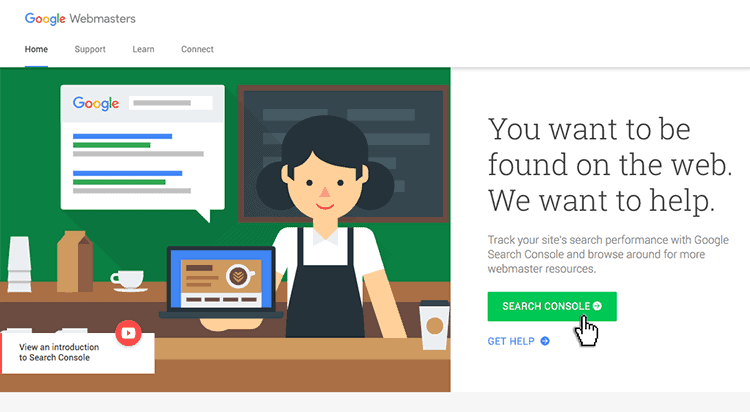
To register for Google Search Console:
- Visit: https://search.google.com/search-console/
- Sign up with your Google account and you will reach the WMT dashboard.
- Click “Add Property” and add your websites URL.
- Google will now offer you a number of ways to validate your website. The quickest and easiest route is using the domain registrar verification. Follow the steps.
Now that’s done Google will start collecting data on your website. It may take a few days to start showing any statistics, but trust me when I say this is a seriously helpful resource. They will notify you if they find issues on your site, tell you about improvements and generally look after your sites health in the search engine.
Submitting a sitemap
If you have set up the Yoast SEO plugin, your website will automatically have an XML sitemap created. XML sitemaps is essentially a private page on your website which tells the search engines where to find your websites pages.
Yoast would have created your sitemap at: yourwebsite.com/sitemap_index.xml
In Google Search Console, lets submit the sitemap to notify Google about new pages on our website:
- Click “Sitemaps” in the left menu
- Under “Add New Sitemap” enter your sitemap URL
- Click “Submit”
Now every time you publish a post of page Google will be notified immediately and will come and crawl your new content.
How to get indexed quickly
If you’re inpatient like me you probably want to get your website indexed as quickly as possible. Thankfully Google have provided us with a tool that helps us do this. However, do not abuse this tool!
- Click URL inspection in the left menu
- Copy and paste your home page URL in to the bar at the top and hit enter.
- Google will now crawl your website and notify you “Retrieving data from Google Index”
- Now click “Request Indexing”
Give it up 24 hours or so and your new web page will be indexed in Google 🙂
Register for Google Analytics
Google Analytics is a web analytics service offered by Google that tracks and reports traffic on your website. I highly recommend installing this to help keep on top of your website visitors interaction with your content.
You can either install analytics on your website manually or using a plugin, as you have only just learned how to build a website, I’m going to show you the easier option which is installing using a plugin.
- Visit https://analytics.google.com
- Register with the same gmail address as you did for your Google WMT account.
- On the next screen, you’ll be given a choice to choose between a website or mobile app. Make sure you select website.
- Fill out your website details and agree to the terms and conditions.
- You will be presented with your Google Analytics tracking code. Copy this tracking code because you will need to enter it in your WordPress site
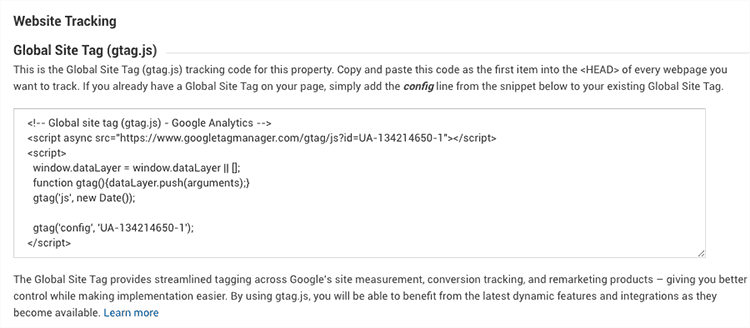
Adding the code to your site:
- In the WordPress Dashboard go to “Plugins” -> “Add New”
- Search for the “Insert Headers and Footers” Plugin. Install and Activate.
- Go to “Settings” -> “Insert Headers and Footers”
- Copy and paste the Analytics code in to “Scripts in Footer” section and click “Save”
That’s it, you’re done. Now Google Analytics will start tracking your website visitors. You can login to the Google Analytics Dashboard after a few days to start evaluating your websites traffic.
NOTE: There are of course lots of other tools available such as Bing Webmaster Tools, Yandex Webmaster and many others. I advise registering for all of them to help get your website indexed and provide as much coverage as possible.
Congratulations – you just built a simple website!
All you need to do now is continue building on what you’ve created — keep adding engaging content, promote your site across the web, and focus on growing your online presence.
Of course, this guide covers just the foundations. If you’re serious about taking your website to the next level, a professionally designed, high-performing WordPress site can make all the difference. Whether you’re looking to attract more visitors, generate leads, or create a truly polished online brand — we can help.
If you’re ready to upgrade to a premium website, get in touch with us or tell us more about your project via our Project Planner. Let’s build something amazing together.